I’ve been meaning to put together a post for a while, detailing my thoughts and recommendations on cloth diapering. Let me just say first that we love it. The times we’ve had to use disposables, we’ve had a poor experience in comparison to cloth diapering (only made better by some cotton flannel diaper covers I made that I ended up using over the disposables–can’t get enough of cloth!) There are pros and cons of each, and I certainly don’t judge or blame anyone who does use disposables–cloth is just the right way for us! And, I think, less expensive than one might imagine. And less gross. And much easier than you’d think, once you get into a routine.
In this post, I will discuss several strategies we’ve tried with our notes on what worked. I’ll talk about prefolds, diaper covers, pocket diapers, all-in-one diapers, extra inserts, and cloth wipes and liners (with bonus info on reusable nursing pads!) I’m including links to a few DIY aspects that we found worthwhile, and which saved us some serious coin. I’ll also talk about making your own wipe solution and our recommendations for washing cloth diapers. We’ve tried a bunch of different cloth diapering strategies as our 5lb baby has grown into a 17lb. baby over the past 5 months. I even made some of my own diapers completely from scratch! Maybe I’ll make a DIY post about those later… but for now, we’ll stick to the simple essentials.
Here is a list upfront of some of our Favorite Things (you don’t need all of them–read on for more details):
- inexpensive, off-brand pocket diapers (6-12) or pocket diapers of your choice…
- microfiber inserts (usually come with pocket diapers) (6-12)
- 5 layer charcoal bamboo inserts (6)
- organic hemp inserts (6)
- prefold diapers (18 XS for small babies, maybe just 6-12 for regular newborns then 18 size small or medium as baby grows)
- Snappi prefold closures (1-3)
- flip diaper covers (2-4)
- Rockin’ Green diaper detergent
- wet bags for travel (2) and large wet bags for home use/storage between washes (1-2)
- If premature or small baby: x-small diaper covers (2)
- Bum Genius All-in-one diapers (6-12)
If you don’t know what all these terms/types of diapers are, no worries, I didn’t either! AIO (all in ones,) pocket, prefolds, flats, etc… start by learn about them all in this video by ObbsandLala: https://www.youtube.com/watch?v=wKtrbXO-lik&feature=share There are even “skip ahead” links if you want to skip a particular description.
Below, I’ll talk about the most minimal set of items that I feel one could get and have a good experience with cloth diapering, as well as what you may want to add on to your collection over time. We were lucky to be able to borrow a bunch of prefolds and covers from our friend Staci. Borrow and take hand me downs whenever you can! It’s great! And loan yours out when you’re done with them! I researched lots of used diaper sales on EBay. That may work for some, but after shipping costs added on the price, it didn’t seem worth the damage they’d endured for us. If you live in a bigger city than us, you can probably find more deals at yardsales and on Craigslist. I didn’t have too much luck in our more rural neck of the woods, though I did find about 10 prefolds for 10 cents a piece!
Prefolds
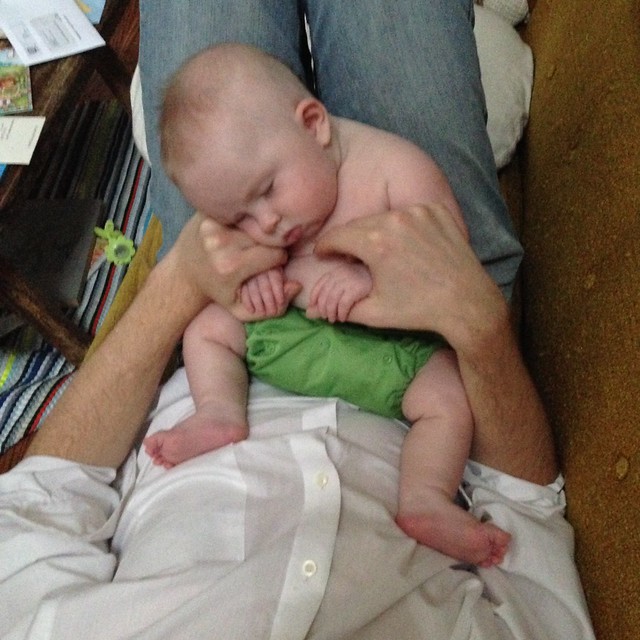
Prefolds are “old timey,” and still excellent! They wash and dry quickly and easily. We use these all day. If you’ve got 18 of these puppies + 2 covers + a few AIOs and/or pockets for nighttime, I’d say you’re set. The XS size prefolds were the only thing that fit Levee when he was born since he was just over 5 lbs.
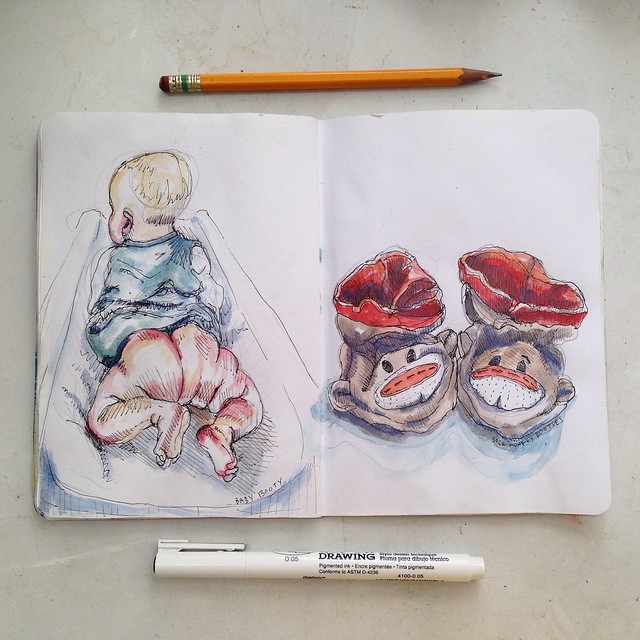
This is what a 5-6lb baby looks like in an XS cover with a newborn prefold underneath!
On top of the prefolds, you just need a cover such as a Flip, Thirsties, or other brand velcro or snaps waterproof layer (flip diaper covers.) And you might like some way to keep the diaper closed if you want to do a fold other than a flat or trifold. We use Snappis (Snappi prefold closures), but they still sell old school diaper pins, too. Snappis seem a little less likely to prick yourself or your baby on.
Here’s a great page about different folding techniques: Everything You Need to Know About Prefold Cloth Diapers. We use something similar to the “jelly roll” technique most of the time.
Pros: Inexpensive, sizes are pretty flexible for long use (you can use them as tri-folded inserts in covers or other types of diapers long after they outgrow them), last forever, can put in washer and dryer or line dry, dry fairly quickly, they also work great as burp cloths/wash rags, they fold down small for travel (a cloth diapering diaper bag can get full really quickly! Prefolds take up some of the least space,) and after baby is all grown up they still work great as all purpose rags around the house!
Another Big Pro: you can use covers several times before washing and just change the prefold out inside. Also, they dry in seconds! You can even quick hand wash them and shake them out to use again immediately.
Cons: meh, hard to come up with any real cons except you need to add some extra inserts/doublers for overnight at some point. We use pockets or all in ones for nighttime because it’s easier to add more layers of absorbency. I guess another con would be that you need a cover in addition to the diaper itself, but if you have 2-4 covers like these flip diaper covers, that will be plenty! You just need the cover as a top, waterproof layer to hold in the moist and any explosive poops.
Note on Flats: I’ve also read good things about Flat diapers–which are basically just big pieces of fabric that you fold down to diaper with, similar to prefolds. The advantages might be faster drying time, and they are probably fairly inexpensive. Cons would be just more time folding them down.
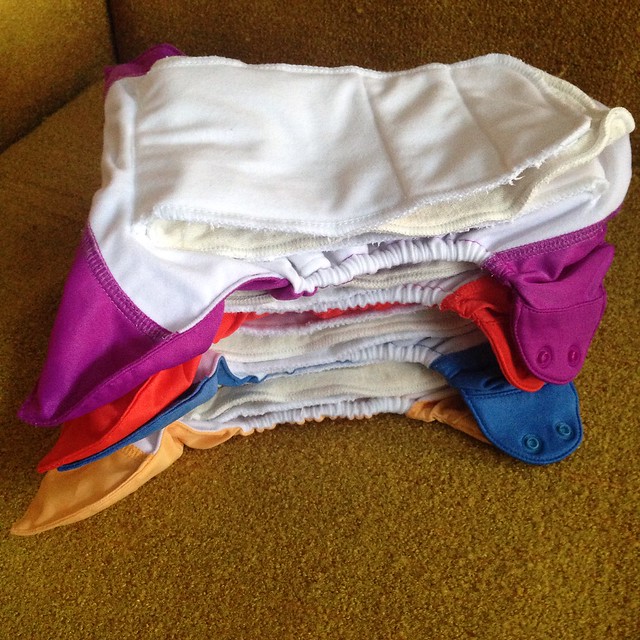
Pocket Diapers
Boy, did I worry for a long time about what kind of pocket diaper to get! I read so many blog posts and watched so many videos on YouTube. We ended up going with one of the many off-brand pocket diapers available on Amazon.com to be economical (BumGenius also makes some great ones for more $ but I don’t know that they’re that much better–maybe they hold up longer? I’ll see, I guess, but so far they are fairly comparable to the cheap ones), and we got some more absorbent inserts to boost their power for nighttime (hemp and bamboo: see the section on “inserts” below for more info.) The thing about the off-brand ones is that they are sold under many names, but from what I’ve read, they are all mostly made by the same company with just slight differences in pattern.
I love having some of these for quick daytime changes on the go (gas station with no changing table, in the car, on the floor/table/anywhere I can find!,) for cloth diapering noobs who may be helping us out/babysitting, and for days where I’m too lazy to deal with that Snappi business for prefolds (see above.) Also, at night they have been saving our butts! We just put in a charcoal bamboo insert (5 layer charcoal bamboo inserts) + a hemp insert (organic hemp inserts) rather than the microfiber inserts the diaper came with to make it last all night without leaks or wetness! Even the expensive all-in-ones were failing us at night because they just got so bulky with added inserts that the elastic wasn’t able to grab tight around his tiny body. I’m sure they will work better again later when he gets bigger and more mobile.
See, the great thing about these diapers is that the fabric right against baby’s skin still feels pretty dry, even when the inserts inside the diaper are completely soaked! It helps prevent rashes and keeps baby from waking up feeling wet. Also, you can stuff them with different combos of inserts as needed for car trips, overnight, or just light, daytime use. I’d recommend having 6-12 of these if you can for overnight/some day use.
Note: Sometimes big handed folks have trouble stuffing pocket diapers with inserts.
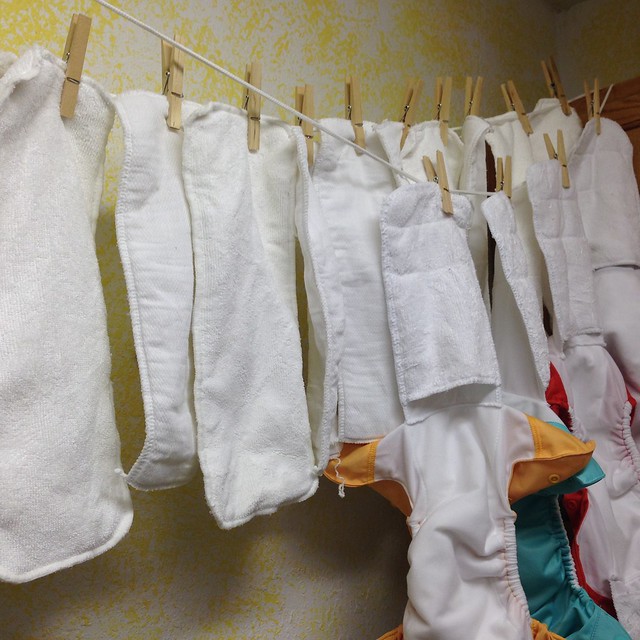
All in Ones: Not Essential, But Pretty Good
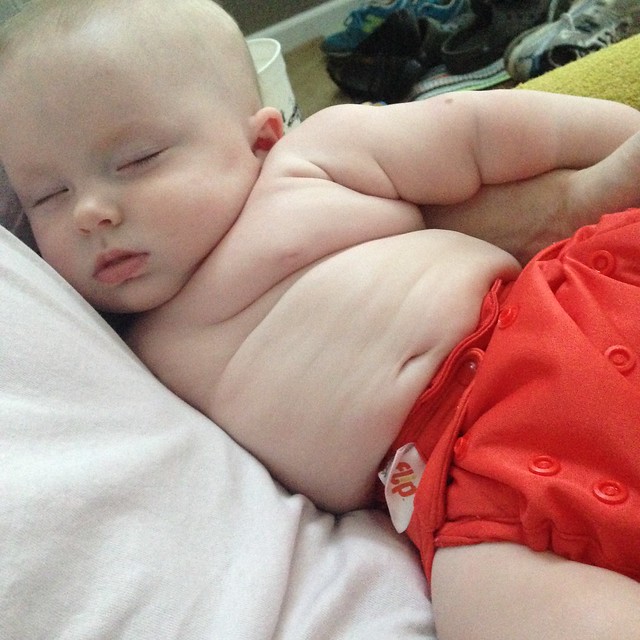
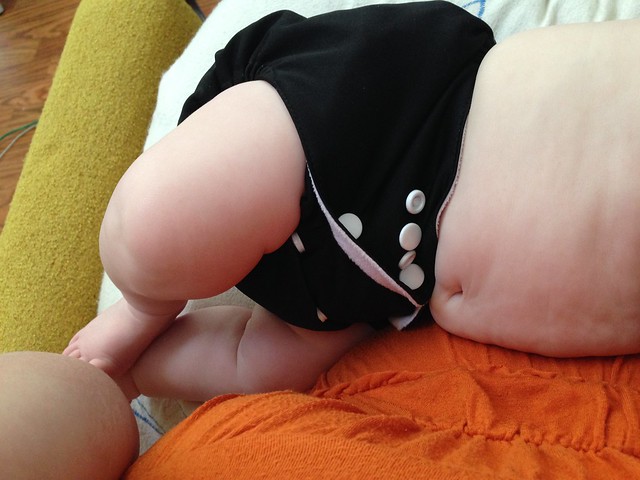
Some AIO diapers with an extra hemp booster thrown in…
There are several brands of these All in Ones or AIO diapers that I’ve heard good things about! We love the BumGenius. They are on the expensive side, but they have a long life and are super easy to use. You don’t have to have this type of diaper, but it can be good to have half a dozen of them for nighttime use or for sending to daycare or for babysitters, since they are highly absorbent and easy to use. My recommendation: have 6-12 AIO for nighttime use and quick day changes. I have some friends that use AIOs exclusively, and they are very happy with them. If you want a low maintenance diaper set up, this may be for you. You could just get 24 of these and be good for several days at a time between washes!
Pros: easy to use (work just like a disposable), absorbent, can add extra inserts/liners but don’t have to, long-lasting, no prep time
Cons: best to line dry, take a while to air dry, more costly, can get really bulky (especially on young, small babies–they work best after baby is 10-11 lbs.)
You can get one size fits all versions or sized diapers. Whatever you want! We wanted to invest once in a bigger stash and have it last us as long as possible, but it may also work better for you to go with sized ones, especially if you find a deal.
Inserts: Extra Absorbancy AKA Boosters
Some reading material I recommend:
- Microfiber, Hemp, and Bamboo: Learn the Differences
- The Truth About Microfiber (still good to use sometimes!)
- DIY Cheap Diaper Inserts (basically how I made my liners, but with a different fabric)
- And a non-essential, but informative rundown on a few other brands of inserts
So, All in One diapers and Prefolds don’t have to have inserts all the time. All in Ones have inserts already attached, hence the name “all in one.” Prefolds can be folded to function like inserts, or wrapped around the baby with a Snappi or diaper pins–no inserts needed for light use. Pocket diapers–they require some sort of insert. But all diapers benefit from the use of extra inserts, especially for overnight diapering.
We’ve tried a range of inserts (make sure to read the first link just above,) and we use different combos depending. During the day, we use prefolds with a homemade liner in a Flip cover. When he was just born, we used disposables at night the first couple of weeks and XS size prefolds with XS sized covers, no inserts needed–it would’ve been too bulky, anyway.
For pocket diapers during the day, we use a single microfiber insert (2 came with each pocket diaper) and a homemade cotton liner to protect the diaper from butt cream. At night, we use a pocket diaper with 1 charcoal bamboo insert + 1 hemp insert + a cotton liner at 4-5 months old. This soaks up so much pee that he can make it through the night! Some parents get by with a pocket stuffed with 2 microfiber inserts at night.
Here’s the thing, microfiber are SUPER absorbent. They just can’t touch your kid’s skin in the diaper because they will end up drying it out too much! But they are fine if inside a pocket. I’ve heard they absorb smells over time, too, and may need to be stripped (see washing section below.) Also, they may tear up quicker. But they are inexpensive, and they do absorb a lot!
Bamboo inserts are wonderful, and hemp inserts are even better as they dry quicker and absorb just as much! We use a combo right now to make it work, but I feel that the bamboo and hemp are a luxury. You could totally start out with some inexpensive pocket diapers with 1 microfiber insert then go to 2 as needed as your pee-bucket gets bigger and bigger! As they tear up over time, replace them with bamboo or hemp inserts to improve your stash.
An Aside: Velcro vs. Snap Closures
Many diapers and diaper covers come with the option of velcro or snap closures. I’ll give you the pros and cons of each as I understand them. Personally, I preferred velcro when he was smaller (except for the sound!) and snaps as he gets bigger so, if I had to choose just one, I’d go with snaps!
Disclaimer: “Velcro” is actually a brand name, so you’ll often hear the term Aplix (or even “hook and loop”) to describe the same damn thing.
Velcro: Pros:
- Easy and quick! You’re up in the middle of the night… again! and again! You can fasten velcro half asleep.
- Very adjustable: there is more leeway in sizes with velcro
- Easy to replace yourself if it wears down
Velcro: Cons:
- If you don’t have a good way to close it while washing (most diapers have a mechanism for this,) or if you forget to, it can stick to other items in your wash/dry and tear them up
- Wears down quicker over time
- Some younger babies hate the sound of velcro/it wakes them up and makes them cry
- Older kids can easily undo it themselves and go streaking around and pooping up the place!
Snaps: Pros:
- More difficult for kids to undo them themselves
- Last longer
Snaps: Cons:
- Hard for older or less dextrous hands to close and open
- More difficult to replace yourself if they do break
An Aside: Nighttime Diapering
You are going to go through periods where you may think–we will never get through the night using cloth diapers without baby waking up wet/a puddle of pee! Many parents I’ve spoken to about this said that at certain periods they switched to disposables at night. This is totally fine!
Others have sworn by various brands/combos of inserts to get them through the rough periods.
Right now, we’re experimenting and we’re making it through with a pocket diaper stuffed with 1 hemp inserts and 1 bamboo insert. I know his pee quantities will keep growing, though, so I’ll keep you posted on how we deal with this!
I just wanted you to know that you’re not doing anything wrong if you run into issues. It’s normal! It helps to have a waterproof mattress cover and several changes of fitted sheets in case of accidents.
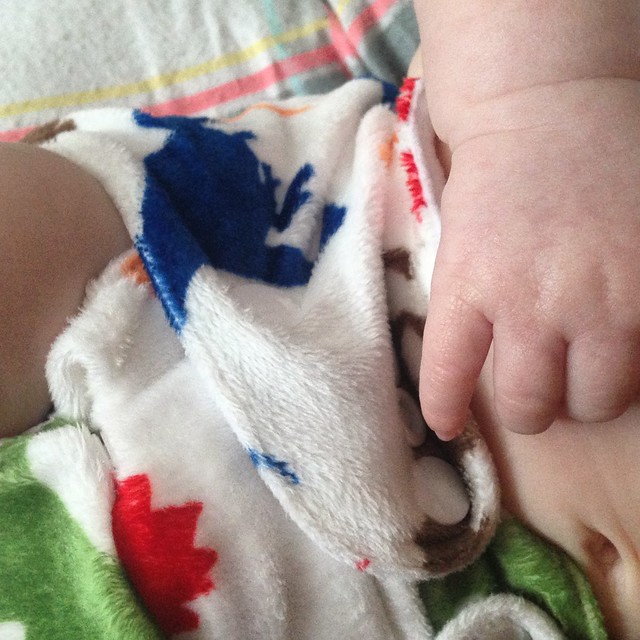
DIY Cloth Wipes & Liners
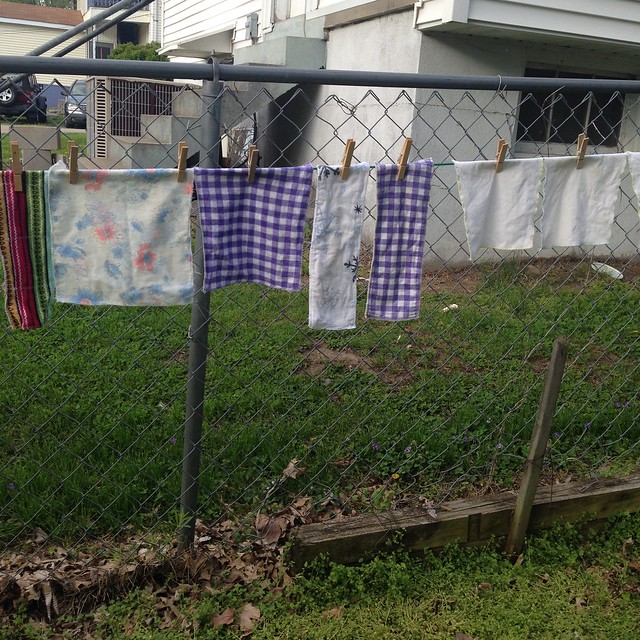
Purchase or find donated 100% cotton flannel material to make inexpensive cloth wipes and diaper liners!
What are liners? They are a thin material that can line any type of diaper. Why do you need liners? Well, you don’t have to have liners, but they are great for several reasons:
- If you check the diaper, and it is just a tad wet, you can just remove the liner, close it back up, and you’re good to go.
- They add a little extra absorbancy and protect the bottom from other inserts (because microfiber should never be directly against your kid’s bottom)
- Liners help protect the diaper from poo stains (although those come out with the sunshine!)
- Liners protect the diaper from getting clogged with diaper cream. Diaper cream is necessary sometimes to clear up diaper rash! Unfortunately, it also tends to “clog” cloth diapers, reducing their absorbancy and causing you to have to “strip” the diapers in the wash–it works, but it takes extra time and water.
Why do you need wipes? To clean the poo and pee off your baby’s bum!
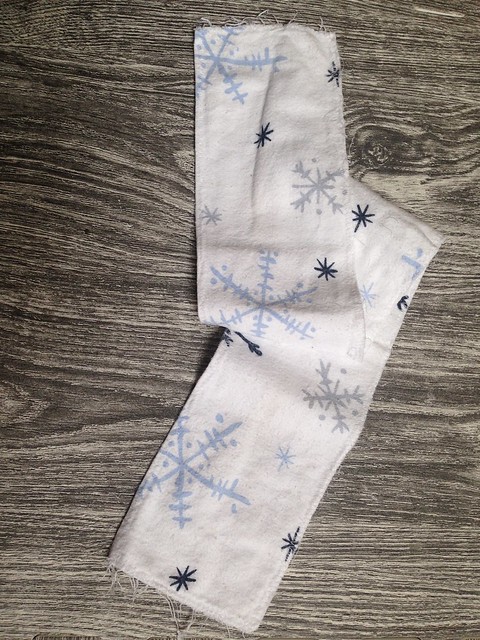
Think cloth wipes are one step too far into cloth diapering land? Well, let me tell you, it’s honestly easier to use cloth wipes and liners if you’re already cloth diapering. You can just throw them in the wet bag with everything else rather than having to separate them out and deal with 2 types of dirty. And they’re soft and easy on the bum. And free if you can get some donated fabric (or cheap fabric from a thrift store!) I got some scraps donated from Grandma Shirley and her quilting peeps, and I also picked up a sheet set from Goodwill. It was summer, and the sheet had snowflakes on it: no one was gonna buy it but me! It was plenty of fabric for my whole project. I also used this fabric to make my own nursing pads. I’ve been really lucky in the breastfeeding department–so lucky, that my boobs started leaking months before Levee was born! I made some of these out of cotton t-shirt material first. Those worked well, but I found they showed up more under my clothing than the ones I made with cotton flannel. A free pattern and tutorial can be found, here: http://diymaternity.com/accessories/how-to-make-nursing-pads-with-free-pattern/
As for how to make liners, we have enjoyed having a couple different sizes/types that are just basic rectangles I cut out and machine stitched in minutes. I made some “snake” liners that are about 26″ long and 4″ wide–2 layers of cotton flannel that I sewed together with a zig-zag or satin stitch, wrong sides facing, and then I just trimmed close to the stitch. I tried some where I sewed back over the raw edge again with another zig-zag stich, and that does seem to help with fraying–but even the fraying ones are staying together after 5 months of serious wear and washing every other day.
You can fold snake liners in half for double absorbancy/protection all the way down (great for girls) or you can fold them heavier/coiled towards the front of the diaper more for boy pee. I tried a few 4-layer shorter liners about 12″-13″ long, and they work well, too. They just take longer to dry than the 2 layer snake liners, with which I can get the same # of layers of protection by just folding in half
I also made some approx. 7.5″ x 9″ single layer cotton flannel rectangles that can be used as wipes or folded in half, hot-dog style to become a mini liner. And I made some 2 layer 12″-14″ rectangle liners, too. Any or all 3 work great! And I used the scraps I had so some are skinnier, some fatter, some longer or shorter–they are all good!
DIY Diaper Wipe Solution
So easy and inexpensive to make! And it’s alcohol free, so less likely to irritate. You can adjust the composition to deal with rashy skin. I’ve read several tutorials on this, but I’ll just summarize here. Mix together in a large mason jar:
- A dash of Johnson’s baby soap, baby shampoo, or a Dr. Bronner’s (unscented is safest/mildest, but you could also use peppermint or tea tree,) Approx. 1 TBS
- A dash of baby oil, Approx. 1 tsp
- 1-2 drops tea tree oil and/or thieves oil
- Fill up the rest of the jar with cold water, Approx 1-2 cups
Shake it up! You can now put this in a spray bottle to spray onto wipes (or directly onto baby’s bottom.) Or you can pour over a stack of wipes in a wipes container–even a little plastic food storage container with a snap on lid works great–but you could also be fancy and use a wipes warmer. We either spray or moisten in a wipes box.
Prewashing/Prepping Cloth Diapers
Before you start using any new diapers or inserts, they need to be pre-washed and prepped. I’ve read a bunch of different methods for this. Sometimes it’ll tell you how on the package. I’ll tell you what we did. Some sources said use detergent, others said it doesn’t matter. Some sources said dry between washes, others said it doesn’t really matter. Meh. I think I did some of both depending on how much time I had.
Disclaimer: Organic cotton, hemp, and bamboo really need the pretreatments to make them absorbent: natural oils in these fibers will block their absorbency if not washed/rinsed properly before use.
Pocket and AIO Diapers: washed 3-4 wash cycles before use (see routine below.)
Prefold Diapers: washed 7-8 cycles hot water before use (see routine below.) A quick spin in the dyer for the final dry makes them soft.
Diaper Covers: don’t really need to be prepped.
Hemp Inserts: washed 4-5 cycles hot water before use. It is important to rinse these a bunch to clean them before using!
Charcoal Bamboo Inserts: Boiled on the stove in hot water several times rinsing inbetween. You can also do multiple hot washes. It is important to rinse these a bunch to clean them before using!
Washing Cloth Diapers

Washing routine: get one! Don’t change it unless it’s not working for you. The basic rules:
- cold rinses before and after
- hot water wash
- a diaper specific detergent only (I’ll explain why) and as little of it as possible
- line drying is best for most types (plus it saves energy!)
- use as much water as possible (I know you’re trying to conserve! That’s part of why you’re doing this–but even when you use a lot of water, you are still leaving less of an impact than if you were using disposables, and lots of water is key to clean diapers)
If you have an HE machine, you’re going to have to figure out some ways to get around the low water in order to get clean diapers. There are lots of tutorials for this online. If you have an older machine, it’ll work great as described below.
Once again, I recommend checking out a video on washing cloth diapers by ObbsandLaLa to get you started: https://www.youtube.com/watch?v=tQStC1O-y1Y
We haven’t had issues with stink yet, but I’m sure there will be more of a chance of that once he’s on solids. Here’s another video by ObbsandLaLa with recommendations for dealing with diaper funk: https://www.youtube.com/watch?v=IVvP3myWQSc
Our routine:
- Whenever we do a diaper change, we put the dirty wipes, inserts, liners, covers, etc. into a wet bag. Make sure to go ahead and remove all inserts from pocket diapers as you change–you don’t want to have to deal with that later! For a while we used a diaper sprayer to spray off most of the poop into the toilet–but this didn’t seem to make that much of a difference, to be honest. Maybe it just made us feel better. We don’t do it anymore.
- When it’s time to wash (every other day for us… sometimes day 3 if we’re busy!,) just empty the whole wet bag into the washing machine. Turn the bag inside out and throw it in there, too.
- I start with a cold soak which, on our machine, includes a bit of agitation (regular speed, highest water level possible)
- Then I do a cold rinse, which spins out the soak cycle (regular speed, highest water level possible)
- Hot wash with cold rinse. I use 2 TBS of Rockin’ Green unscented diaper detergent. (regular speed, highest water level possible)
- Cold rinse again! (slowest delicate speed, highest water level possible)
- Line dry inside on some makeshift lines if it is nasty out, or line dry outside. If necessary, prefolds, inserts and liners can go in the dyer. I don’t recommend using the dryer for any diapers/covers with elastic in them, as it tends to wear it down quickly. Some people do it anyway, though. Adapt to your lifestyle and do what you want! If you do end up using the dryer, I recommend getting some wool dryer balls.
Cold water helps get the poo off the diapers and rinse it away. Hot water sanitizes and really gets the diapers clean. The last extra cold rinse makes sure all the detergent gets out of the diapers, which is incredibly important. We do a “slow,” “delicate” speed on the last rinse to leave everything a bit damp. This allows the sunshine to bleach out any poop stains easier when we line dry.
Are your diapers covered in unsightly yellow poop stains? Don’t worry! The sun will bleach all that out! Just put them in the sun (even through a window will work) damp, and let them dry. If it doesn’t work the first time, try again. Even a cloudy day will make some progress.
You may not think you have room to air dry diapers, but it is easy to use a shoe rack on the back of a door to dry, an inside rack, a simple line run between porch posts, or even little suction cups and bull clips on the inside of your windows to catch sun streaming in from outside.
Note: if you have hard water, look up how to wash your diapers in that situation. You may need a special detergent. Rockin’ Green makes one just for hard water.
An Example Low Budget Stash for Newborn to 12lb Baby
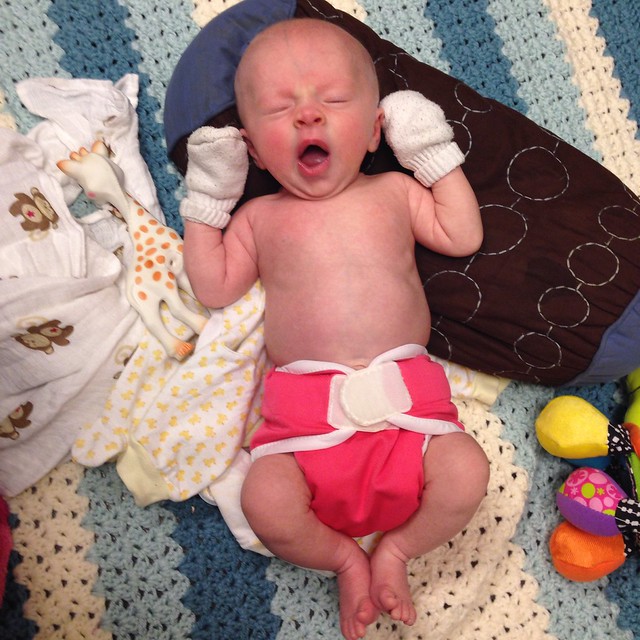
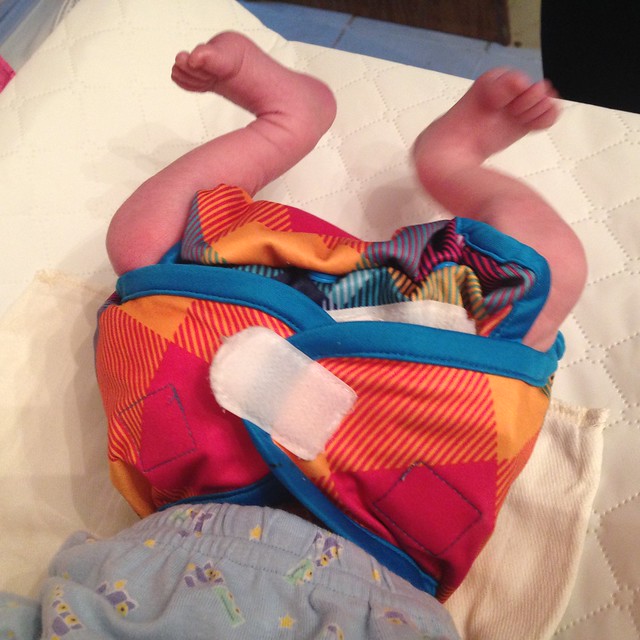
Levee in a size XS cover with newborn pre fold underneath
- XS Prefold Diapers (they even have Preemie size if you need!) (12-18) $25-45
- XS Diaper Covers (such as Thirsties brand with velcro) (1-2) $18-$30
- Snappi Diaper Closures (or diaper pins) (1-3) $5-$11
Total: $58-$86 or less if you find used/can borrow some!
Some parents choose to use disposables until their baby is up to around 10lbs when larger prefolds, pocket, and AIO diapers will fit baby’s bottom better. We had 6 XS prefolds plus several XS covers on loan, and they were working great, so we just ordered 12 more XS prefolds for about $25, and that saved us money over using disposables that whole time.
An Example Stash for a Low Budget
These would work for babies around 6-8lbs. and up. Prefolds are sized, but you can generally use a larger size folded a different way over a long time period.
- Size Medium Prefold Diapers (12-18) $35-$65
- One sized Flip Diaper Covers or Other covers (1-2) $18-$30
- Snappi Diaper Closures (or diaper pins) (1-3) $5-$11
- Inexpensive Pocket Diapers that come with 2 microfiber inserts each (6) $25-$35
Total: $83-$141 new (you can always source used ones!)
Prefolds work great during the day! It’s easy to adjust the size by how you fold them. You can even just trifold them and use them as an insert in the cover if you don’t have a Snappi or if they are too small to wrap around your baby anymore. I recommend having a few pockets for night. You could even get away with 2-3 and just do laundry everyday. This stash should get you through a day or two between washes.
Our Preferred, Still Inexpensive Stash

- inexpensive, off-brand pocket diapers (6-12) or pocket diapers of your choice…
- microfiber inserts (usually come with pocket diapers) (6-12)
- 5 layer charcoal bamboo inserts (6)
- organic hemp inserts (6)
- prefold diapers (18 XS for small babies, maybe just 6-12 for regular newborns then 18 size small or medium as baby grows)
- Snappi prefold closures (1-3)
- flip diaper covers (2-4)
- Rockin’ Green diaper detergent
- wet bags for travel (2) and large wet bags for home use/storage between washes (1-2)
- If premature or small baby: x-small diaper covers (2)
- Bum Genius All-in-one diapers (6-12)
I didn’t price all of this out for you. Sorry. Prices are gonna vary, anyway. We’re pretty happy with all of the above stuff.
Note: Wet bags! These are great! We use the small ones linked above in the car or diaper bag. The bigger pail liners we use at home. We have a great diaper dekor diaper pail (Thanks, Tracy & Kendal!). It isn’t necessary right now because his poop/pee doesn’t smell too much, but we will be grateful for it later when he starts eating more different types of food, I’ve heard. You can just use the bags without a pail and that works fine, too.
Traveling With Cloth Diapers
If you’re only going to be gone 2-3 days, you can save up all your dirties and just pack them home. If you are going to a relative’s/friend’s house for longer, just ask if they mind you using their washer. Offer to clean it out afterwards, even though it really self cleans as you go for the most part. Here is a tutorial on how to clean a washing machine: http://www.clothdiaperrevival.com/2012/11/cleaning-your-washing-machine.html
At first, I was pretty shy about even going out to the store or dinner or anywhere with cloth, and we did disposables for a while on the go. But, gradually, my confidence built, and I now find it easier and better to use cloth over disposables!
You can find more great info/tips on this elsewhere on the web.
In Conclusion: A Summary of a Few Benefits
1. You Save Money (source: http://www.kidsgrowth.com/resources/articledetail.cfm?id=431):
How many Diapers Will your Baby use is the First Year?
|
age |
diaper changes |
number of |
cost* |
|
0-1 mo |
10-12 |
320 |
$64.00 |
|
1-5 mo |
8-10 |
870 |
$174.00 |
|
5-9 mo |
8 |
870 |
$174.00 |
|
9-12 mo |
8 |
728 |
$145.60 |
*based on an average price of 20 cents per disposable diaper
In a baby s first year, new parents will have brought home an average of 2,788 diapers for a total cost of $557.60
2. Cloth diapers may be gentler on your baby’s bottom. Who wants all that bleached plastic on their baby’s butt if they can help it?!?
3. You help the planet by preventing more disposables from going into landfills! Most disposables can take hundreds of years to decompose.
You can find some disposables made with safer materials and that decompose more readily. They do cost more.
4. By using cloth, you use fewer diapers over the course of your baby’s growth, which saves on production costs/resources in addition to saving your wallet. You can loan or resell them after use. Most wear and tear can be repaired.
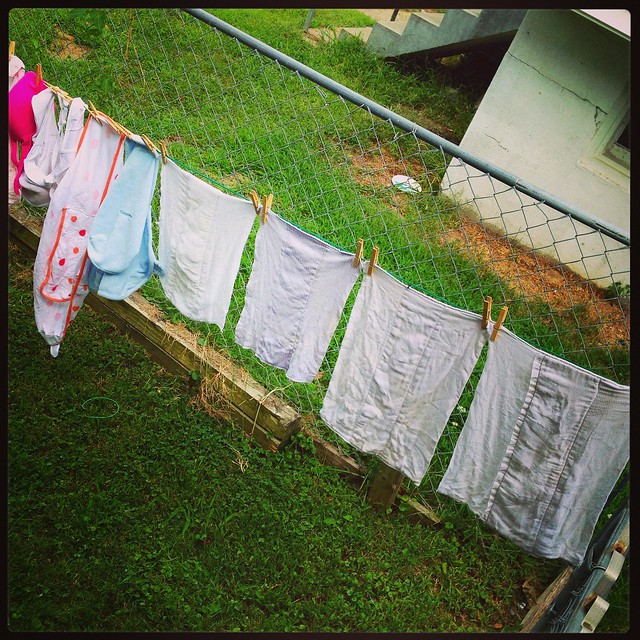
5. Laundry Time can become your Zen Time. Levee loves going outside with us when we hang up his diapers. Plus diapering became my way of “nesting” before he was born–reading up on all this stuff, sewing things, collecting diapers (thanks to all our friends and fam who helped us out with this process on our registry or by giving gift cards or $ for Levee!!)
6. Cloth Diapers are Cute! They come in so many colors and patterns… and even if you’re like me and don’t think you’ll be into dressing up your little one, those cute outfits will get to you eventually… and those cute bum covers…
Even if you just use cloth sometimes or for a while, it may be worth it. Don’t be scared! Consider giving it a go! Feel free to leave comments with your advice/thoughts/favorite brands/strategies/questions. I think everyone has their own advice and strategies.
Lastly, please take what I have to say with a grain of salt, and adapt to your own needs, comfort level, and pocketbook.
Want More?
Check out the “Offspring” Board on our Pinterest Page: https://www.pinterest.com/orangebarrels/offspring/
I’ve got cloth diapering links, hospital bag links, cute kid stuff, DIY tutorials, sewing patterns, and anything else practical and fun I find for the little ones!