Basic Screenprinting with Stencils and Photoemulsion
In the next week and a half, we will focus on basic screenprinting techniques utilizing photoemulsion and, if desired, hand cut stencils to create colorful, multi-layer images on paper. Our objectives will be to create a 2- or 3-layered print utilizing lettering and animal imagery including a key layer and at least 2 colors.
Theme
A Bestiary
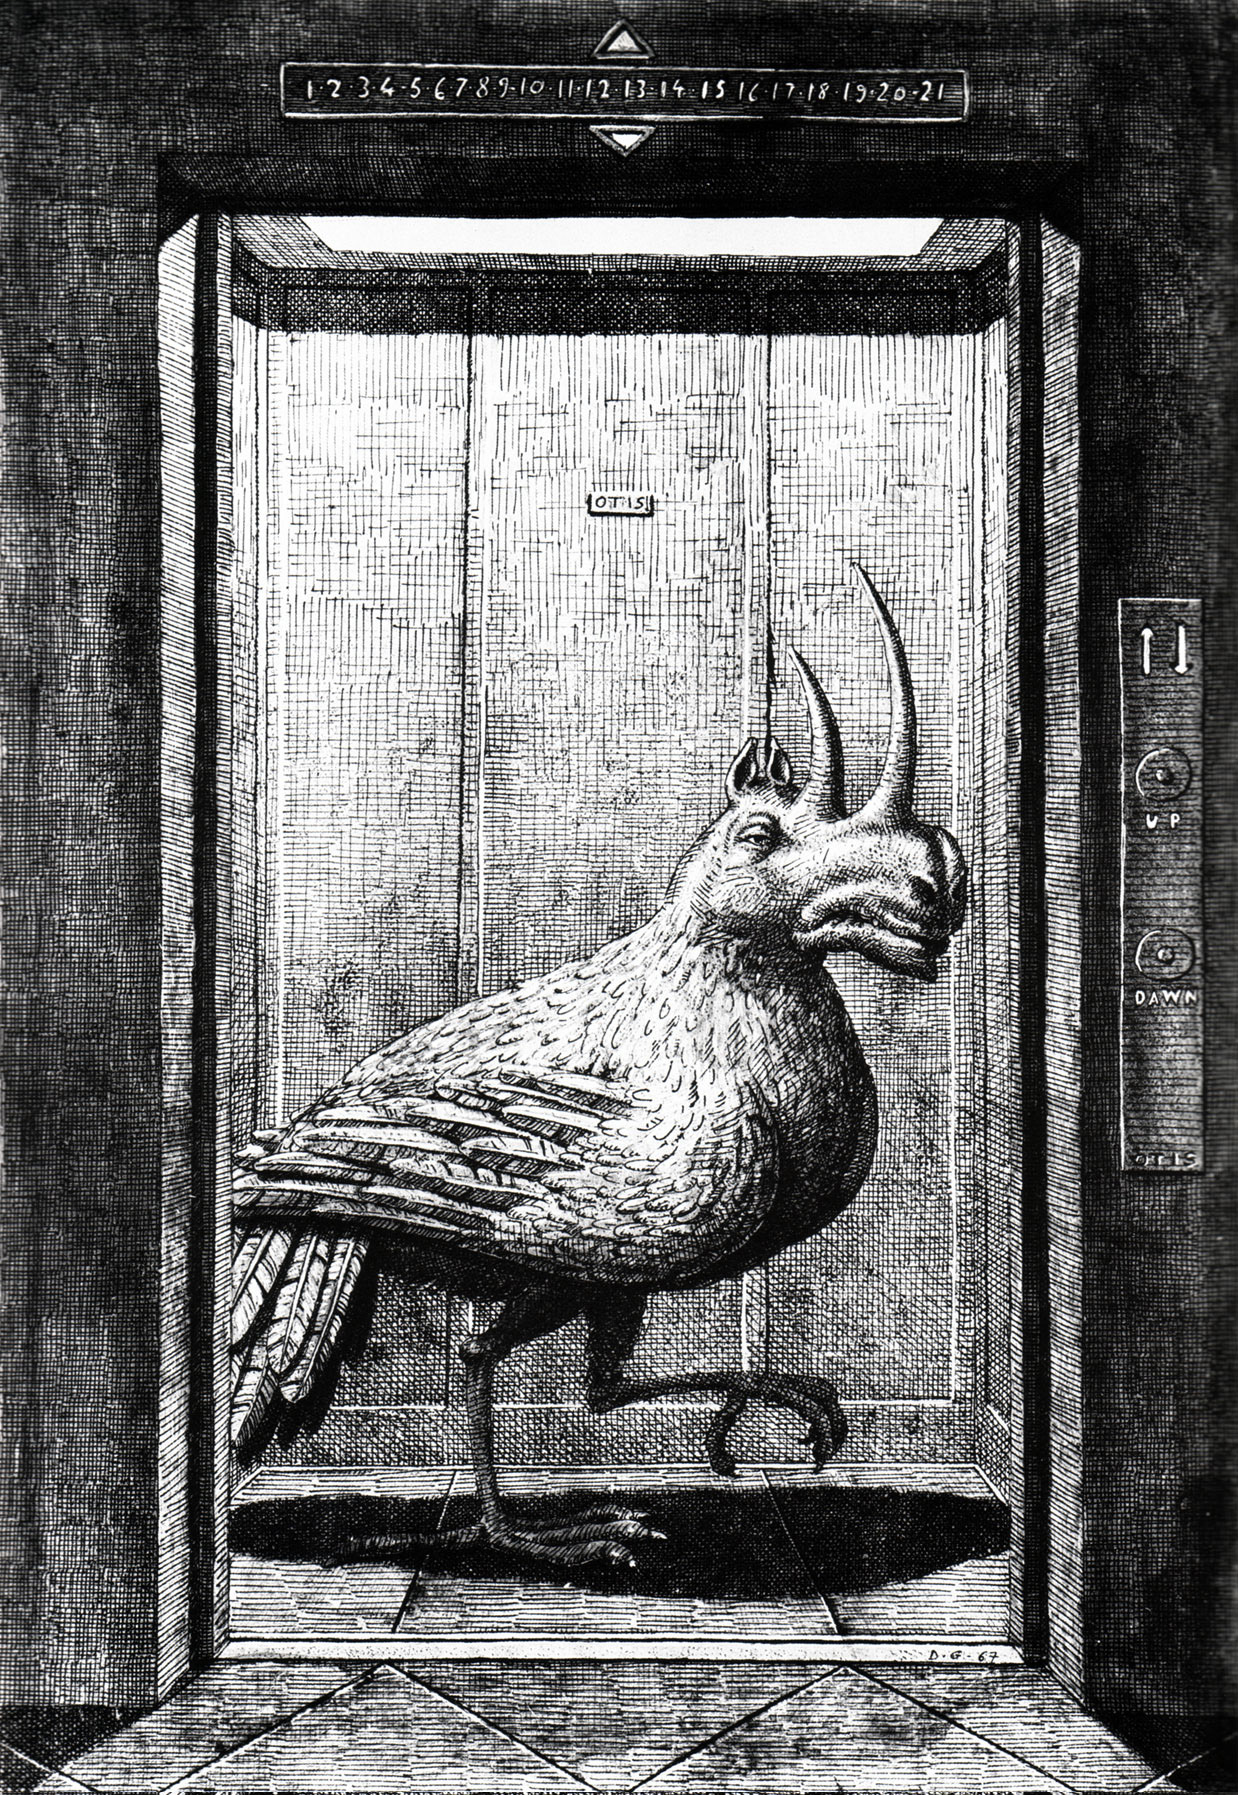
Domenico Gnoli – Modern Bestiary, 1968
We will create an animal-themed image in the style of a Bestiary, which is a compendium of animal imagery defined as, “a descriptive or anecdotal treatise on various real or mythical kinds of animals, especially a medieval work with a moralizing tone.”
Your Objectives: Create an animal-themed image or images, real, imagined, or a bit of both. Consider the entire page. The environment your critter exists in should be as important to your composition as the creature itself. That said, the ground need not be as fully rendered as the example above. We will produce visually engaging grounds using various materials, textures, and techniques.
Resources for Inspiration
- Traditional Medieval Bestiary Imagery: http://bestiary.ca/beasts/beastalphashort.htm/
- Contemporary Artist, Walton Ford: http://www.paulkasmingallery.com/artists/walton-ford
- Birds of America, John James Audubon: http://www.audubon.org/birds-of-america
- Contemporary Artist, Kiki Smith (Click on “Nature” at the bottom): http://www.moma.org/interactives/exhibitions/2003/kikismith/flash.html
- Contemporary Artists, Olly & Suzi: http://www.ollysuzi.com/
- The Artist Beastiary: https://artistbestiary.wordpress.com/
- One of the Oldest, Most Complete Bestiaries: The Aberdeen Bestiary: https://www.abdn.ac.uk/bestiary/contents.hti
- Domenico Gnoli – Modern Bestiary, 1968: http://monsterbrains.blogspot.com/2011/12/domenico-gnoli-modern-bestiary-1968.html
Materials and Equipment
- Tracing Paper or Other Clear or Semi-Opaque White Papers for Film
- Baby Oil to Make Opaque Papers Transparent
- Sharpies, Paint Pens, and Other Highly Opaque Drawing Materials
- Screens
- Wide Masking Tape and/or Packing Tape
- Rags and Sponges for Cleanup
- Water-Based Screenprinting Inks
- Ink Spatulas
- Gloves and Protective Apron
- PhotoEmulsion and Scoop Coater
- Acetate Flop for Registration
- Paper or Other Surfaces for Printing
- Newsprint for Proofing
- Hinges for Holding Screens While Printing
- Darkroom for Screen Storage
- Sprayout Booth for Screen Cleaning, Exposing, and Reclaiming
- Photoexposure Unit for Exposing (PLEASE DO NOT USE WITHOUT INSTRUCTOR PRESENT)
- Screenfiller and, optionally, drawing fluid
- Contact Paper & Exacto Knives for Hand-cut Stencils
Coating Screens

Screenprinting functions like a stencil: Open mesh will print. Mesh blocked off by tape, photoemulsion, paper stencils, etc will block ink from going through the open mesh of the screen onto the surface below.
First, begin by cleaning your screen with water and a degreaser. If it has old emulsion still in it, clean with emulsion remover or bleach to remove the emulsion, then degrease. Allow to dry in a low-dust environment, if possible.
One method of creating a stencil on your screen is through the use of photosensitive emulsion. Screens should be carefully coated with the emulsion in a darkroom, utilizing only safe red light that will not expose the screens to guide your way. A thin, even coating of emulsion should be applied. It need not go right up to the edges of the screen. The proper way to coat a screen will be demonstrated, and you will be assisted with this process, as it may take some time to master.
Screens should then be allowed to dry in the dark room and await exposure.
Creating Film
 Screenprinting film should be binary: either on or off. There is no true grayscale in a screenprinting film. To create or imply value, one must use hatching & crosshatching, stippling, or create multiple layers to be printed in various colors and or values of ink.
Keep this in mind when creating films for printing. Also note that a separate drawing should be created for each color you wish to print. All drawings should be in black, even if you wish to print them in a color. This will make more sense later.
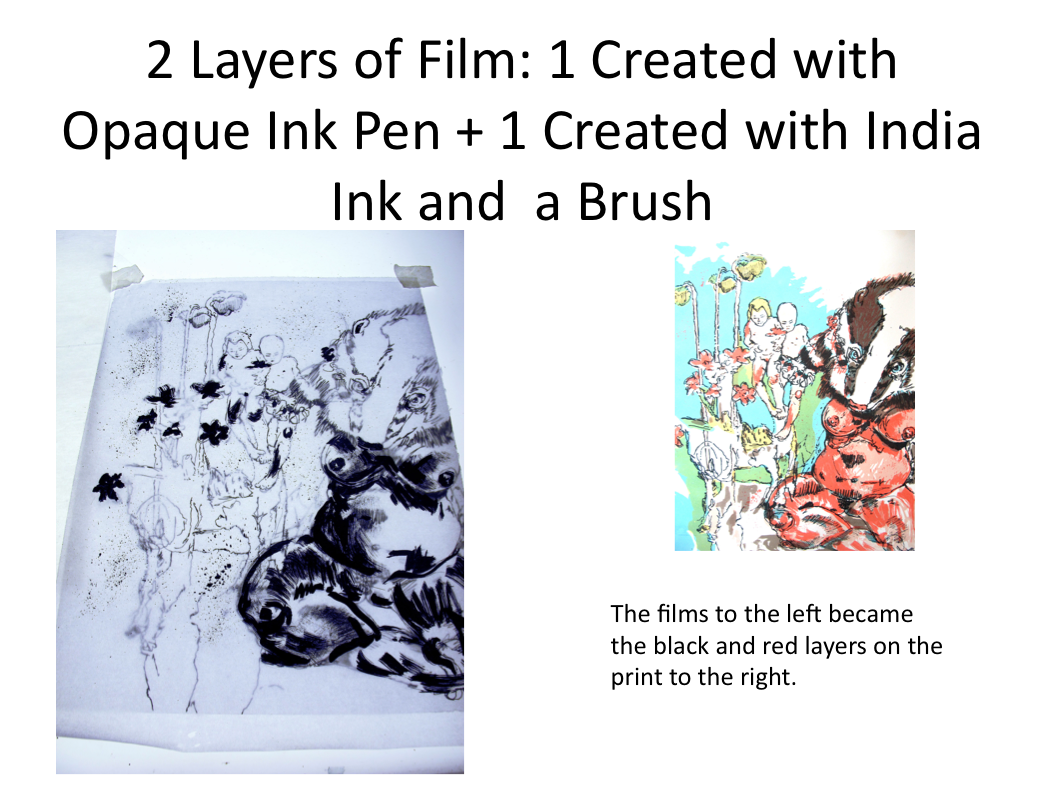
When creating film, use a highly opaque drawing material on a transparent or semi-transparent surface. Example drawing materials include: any type of pen with black India ink in it, Stadler Ink Pens, Micron Ink Pens, Black Sharpies (at least 2 layers for best results), spray paint, charcoal, lithographic grease crayons, photocopied imagery (toner), etc.

Example film materials include: plain white copy paper (baby oiled after imagery is applied to it), tracing paper, frosted mylar, clear acetate, etc.
Exposing Screens
We will do tests to determine our exposure times on this particular unit. Our starting points will be around 26 lumens (light units/seconds) for images on tracing paper and around 40 lumens for baby oiled paper films. We may vary time based on the opacity of your drawing materials and film substrates, as needed. We will work together as a class to determine optimum exposure times so that you will all fully understand the exposure process.


Printing
Much of the printing process is better witnessed and practiced rather than trying to learn from reading about it, so please just use these notes as a reminder and not an end-all, be-all guide to how to screenprint.
Printing should begin with collected together all the needed materials first and arranging a clean and organized workspace. Put a printing board with hinges down on a table top and make sure you have your tape, screen, acetate for registration, prepared paper, newsprint for proofing, damp & dry rags for messes, mixed ink color, ink spatula, and a squeegee of appropriate size for your image. We will discuss picking out a squeegee in class.
Generally, one would create a print from light to dark, and warm to cool, but you may want to print your key drawing first and print in transparent color layers on top of that for easy registration.
Tape out any areas on your screen that you do not want to print, from the concave inside of the screen. Make sure to tape out open mesh next to the frame, particularly. Identify any pinholes and tape them out to keep them from printing on the flat side of the screen (if you have not already painted them out with screenfiller).
The most important part of printing is squeegee angle and pressure to apply the correct amount of ink. Always flood screen in between prints to make sure it is primed for the next print. This also helps prevent ink drying in the screen when you are registering your next piece of paper. Never allow ink to dry in your screen. If you have to stop printing, remove all tape and rinse all ink from screen before leaving. Ink drying in the mesh of the screen may permanently damage the screen. You can always set up and print more later after your screen dries from rinsing all ink out with water.
Lock your screen into the hinges on your board. Tape your acetate down to the board on one side and burnish the tape to make sure it will stay in place. Make sure it is under your image area. Put a bead of ink on your screen and lift your screen up off of the board. Flood Screen. Place screen down and print onto a piece of newsprint to check your image. Flood screen and prop up so that it doesn’t touch down fully to the board. If satisfied with your image and color, print one directly onto your acetate. This will be your guide for registration. Lift and flood screen and prop up while you register your a newsprint proof paper underneath the printed image on the acetate flop. Flip acetate flop back from on top of your paper and proceed to print on your proofing paper. Repeat until desired results achieved, then move on to printing on your good paper.
If ink starts to squish or dry in your screen, try proofing onto newsprint and cleaning off the flat back of your screen with a damp then a dry towel. Go back to printing on good paper when the issue is resolved. We will assist you with other troubleshooting during class time.
Hand-cut Stencils
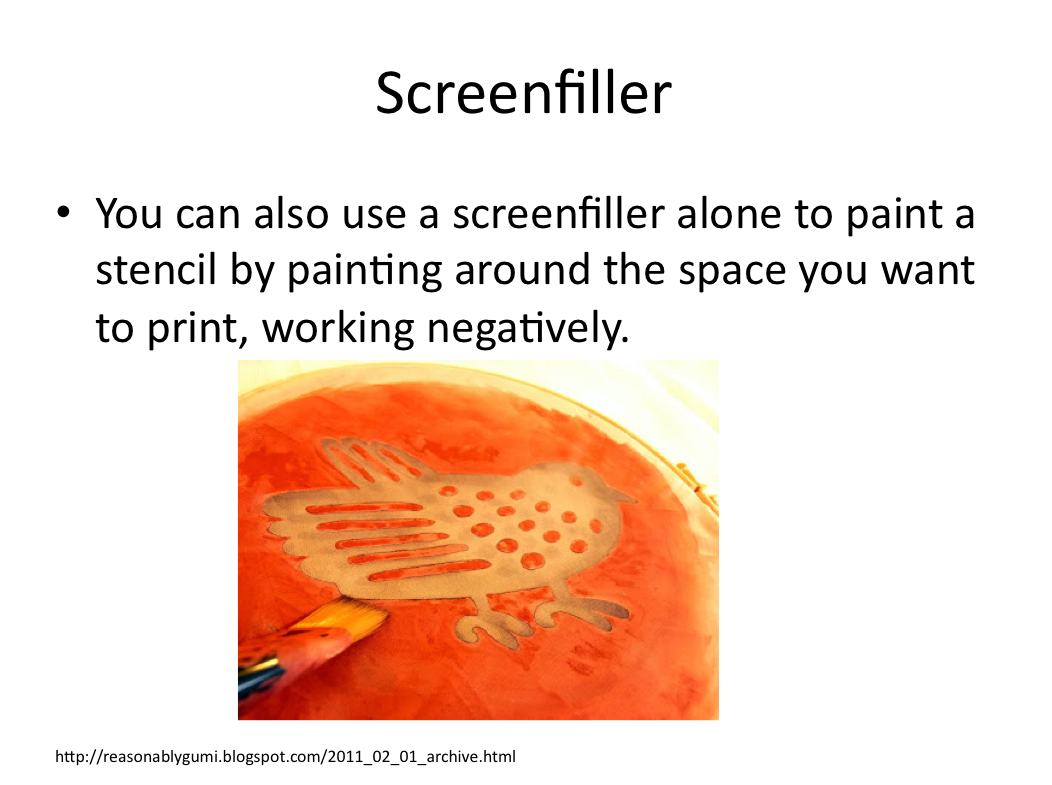
In addition to the use of photoemulsion, you may also use handcut stencils on a clean screen to create screenprinted imagery on paper. Big shapes work best. We also have some drawing fluid and screenfiller that may be used to manually create stencils on the screen which have thinner lines and smaller shapes, as well as a brushwork texture, if desired.


Pingback: Orange Barrel Industries » Hand Cut Stencil Screenprinting
Pingback: Hannah March Sanders » Workshop: Tennessee Governor’s School for the Arts